背景の画像だけを暗くしたい時は、Photoshopなどで画像を編集するよりも、CSSで黒の半透明レイヤーを重ねる方が早くて簡単です。
しかし、暗くした画像の上に文字を表示させる時は、文字は透過させないように工夫が必要です。
この記事では、背景画像に黒い半透明のレイヤーを重ね、その上に白文字を表示する方法を紹介します。
背景画像に半透明のレイヤーを重ねる方法
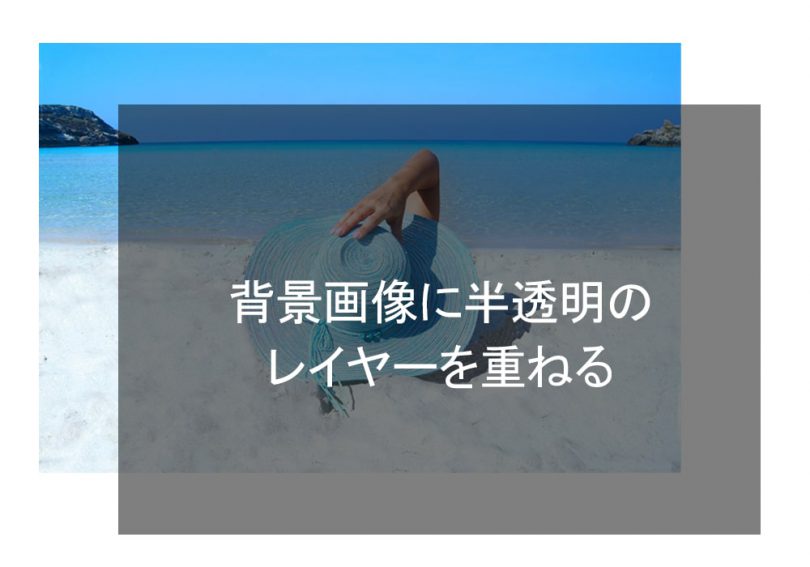
まずは普通に半透明レイヤーを重ねてみます。
背景画像に半透明のレイヤーを重ねる
すると、上記のように文字まで透過してしまい、白く表示されないんですね。
文字が透過されているというよりは、背景画像と白文字の上に黒の半透明レイヤーが重なっている状態です。
HTML
<div class=”box”>
<p>背景画像に半透明のレイヤーを重ねる</p>
</div>
<div class=”box”>
<p>背景画像に半透明のレイヤーを重ねる</p>
</div>
CSS
.box {
width:250px;
height:175px;
background:url(画像ファイルを指定);
background-size: cover;
position: relative;
display: flex;
justify-content: center;
align-items: center;
color: #fff;
text-align: center;
padding: 2rem;
}
.box::before {
width:250px;
height:175px;
z-index: 0;
content: “”;
display: block;
position: absolute;
top: 0;
left: 0;
background-color: rgba(0,0,0,0.5);
}
半透明のレイヤーを重ねるのは、背景画像を指定している要素に:before擬似要素を使っています。
background-colorプロパティでrgbaを指定することで、レイヤーを透過させることができます。
半透明レイヤーの上に文字を表示させる方法
さっきの場合は、半透明のレイヤーの下に文字がある状態だったので、文字を上にする必要があります。
背景画像に半透明のレイヤーを重ねる
方法は簡単で、div要素を一つ増やし、z-indexプロパティで重なり順を調整します。
HTML
<div class=”box”>
<div class=”box-text”>
<p>背景画像に半透明のレイヤーを重ねる</p>
</div>
</div>
<div class=”box”>
<div class=”box-text”>
<p>背景画像に半透明のレイヤーを重ねる</p>
</div>
</div>
CSS
.box {
width:250px;
height:175px;
background:url(画像ファイルを指定);
background-size: cover;
position: relative;
}
.box-text {
width: 100%;
height: 100%;
position: absolute;
top: 0;
left: 0;
z-index: 1;
display: flex;
justify-content: center;
align-items: center;
color: #fff;
text-align: center;
padding: 2rem;
}
.box::before {
width:250px;
height:175px;
z-index: 0;
content: “”;
display: block;
position: absolute;
top: 0;
left: 0;
background-color: rgba(0,0,0,0.5);
}
最初に紹介した例と違うのは、box-textというクラス名のdiv要素が入れ子構造に加わったという点。
あとは、半透明レイヤーを重ねる場合と同じようにpositionプロパティで要素を浮かし、位置を調整。z-indexプロパティで重なり順を指定します。
そうすることで、下から背景画像→黒の半透明レイヤー→白文字という順番で要素が重なり、文字も透過することなく、ちゃんと白色で表示されます。

Leave a Comment